(Created page with "NeoTextureEdit (http://neotextureedit.sourceforge.net/) is a free software (LGPL) Java tool to create procedural and seamless textures with a node based system. It's a bit wei...") Tags: Visual edit apiedit |
No edit summary Tags: Visual edit apiedit |
||
| Line 1: | Line 1: | ||
| − | NeoTextureEdit (http://neotextureedit.sourceforge.net/) is a free software (LGPL) Java tool to create procedural and seamless textures with a node based system. It's |
+ | NeoTextureEdit (http://neotextureedit.sourceforge.net/) is a free software (LGPL) Java tool to create procedural and seamless textures with a node based system. It's weird too use, sometimes super slow, lacks documentation and the examples are not that good. This page tries to help a bit. |
=== Program Explanation === |
=== Program Explanation === |
||
You can move the node view with the middle mouse button and create new nodes with the right click menu. |
You can move the node view with the middle mouse button and create new nodes with the right click menu. |
||
| + | |||
| + | The OpenGL preview area in the lower left can preview diffuse, normal, specular and parallax mapping. Urho3D doesn'T come with a parallax mapping shader, so you may want to disable the parallax mapping feature by setting the "POM Strength" to 0. Which node is used int the preview for which kind of mapping is shown by the blue D, N, S or H at the right side of the node (see second screenshot below). |
||
=== Example Usage === |
=== Example Usage === |
||
| − | This example is based on the cobblestone sample shipped with |
+ | This example is based on the cobblestone sample shipped with NeoTextureEdit , but improved: |
| − | [[File:NTE fix1.jpg|thumb|220x220px]] |
||
| − | [[File:NTE fix2.jpg|thumb|220x220px]] |
||
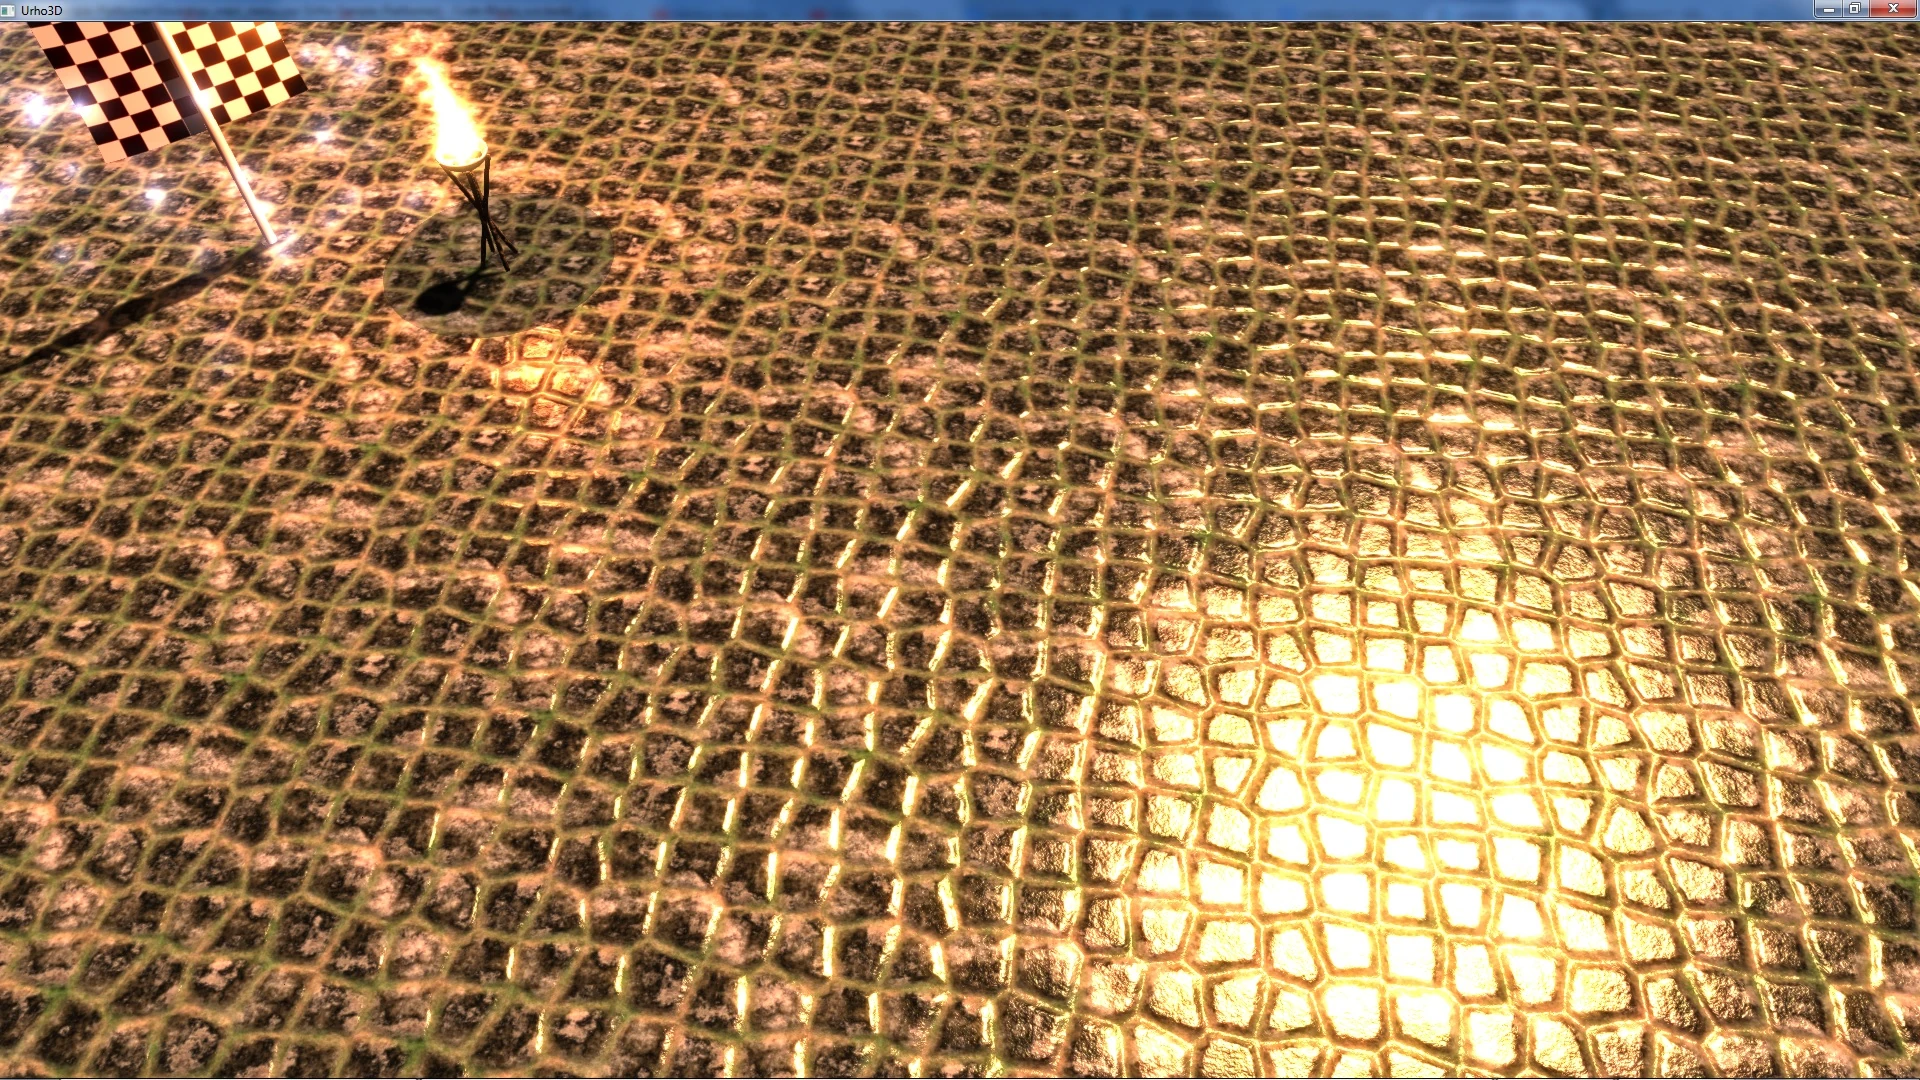
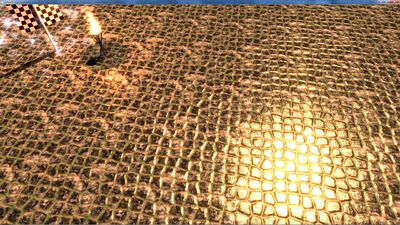
[[File:Urho NTE.jpg|none|thumb|400x400px]] |
[[File:Urho NTE.jpg|none|thumb|400x400px]] |
||
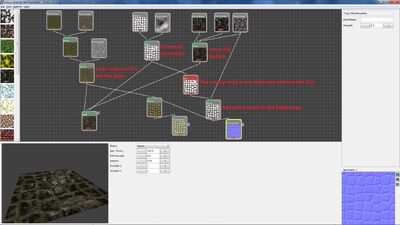
[[File:NTE mossy stone commented.jpg|none|thumb|400x400px]] |
[[File:NTE mossy stone commented.jpg|none|thumb|400x400px]] |
||
| − | Urho material file: |
+ | Used Urho material file: |
| + | <material><br> <technique name="Techniques/DiffNormalSpec.xml"/><br> <texture name="Textures/mossy_stone_diff.jpg" unit="diffuse"/><br> <texture name="Textures/mossy_stone_norm.jpg" unit="normal"/><br> <texture name="Textures/mossy_stone_spec.jpg" unit="specular"/><br> <parameter name="MatDiffColor" value="0.9 0.9 0.9 1"/><br> <parameter name="MatSpecColor" value="1.5 1.5 1.5 250"/><br></material> |
||
| − | <material><br> |
||
| − | <technique name="Techniques/DiffNormalSpec.xml"/><br> |
||
| − | <texture name="Textures/mossy_stone_diff.jpg" unit="diffuse"/><br> |
||
| − | <texture name="Textures/mossy_stone_norm.jpg" unit="normal"/><br> |
||
| − | <texture name="Textures/mossy_stone_spec.jpg" unit="specular"/><br> |
||
| − | <parameter name="MatDiffColor" value="0.9 0.9 0.9 1"/><br> |
||
| − | <parameter name="MatSpecColor" value="1.5 1.5 1.5 250"/><br> |
||
| − | </material> |
||
The shipped examples are often using the "FilterEmboss"-Node which is simulating light fall on the material, which seems to be similar to the "Bump Map"-filter in GIMP (Filters->Map->Bump Map). Such an effect is weird to use to create textures as a bump or normal map should be dynamically rendered in the game (if you use normal mapping) using the textures and should not be prerendered into the textures. |
The shipped examples are often using the "FilterEmboss"-Node which is simulating light fall on the material, which seems to be similar to the "Bump Map"-filter in GIMP (Filters->Map->Bump Map). Such an effect is weird to use to create textures as a bump or normal map should be dynamically rendered in the game (if you use normal mapping) using the textures and should not be prerendered into the textures. |
||
The "Blur"-node (the red one, I guess it's red because it's making the calculation super slow) is used to make the transition between the stone tiles and the gap between them softer. The normal map calculation gives really bad results without this blurring. You can also blur the calculated normal map image afterwards using other tools like Gimp. A slight blur with a radius of 1 or 2 is usually enough. |
The "Blur"-node (the red one, I guess it's red because it's making the calculation super slow) is used to make the transition between the stone tiles and the gap between them softer. The normal map calculation gives really bad results without this blurring. You can also blur the calculated normal map image afterwards using other tools like Gimp. A slight blur with a radius of 1 or 2 is usually enough. |
||
| + | |||
| + | === Fixing the Normal Map === |
||
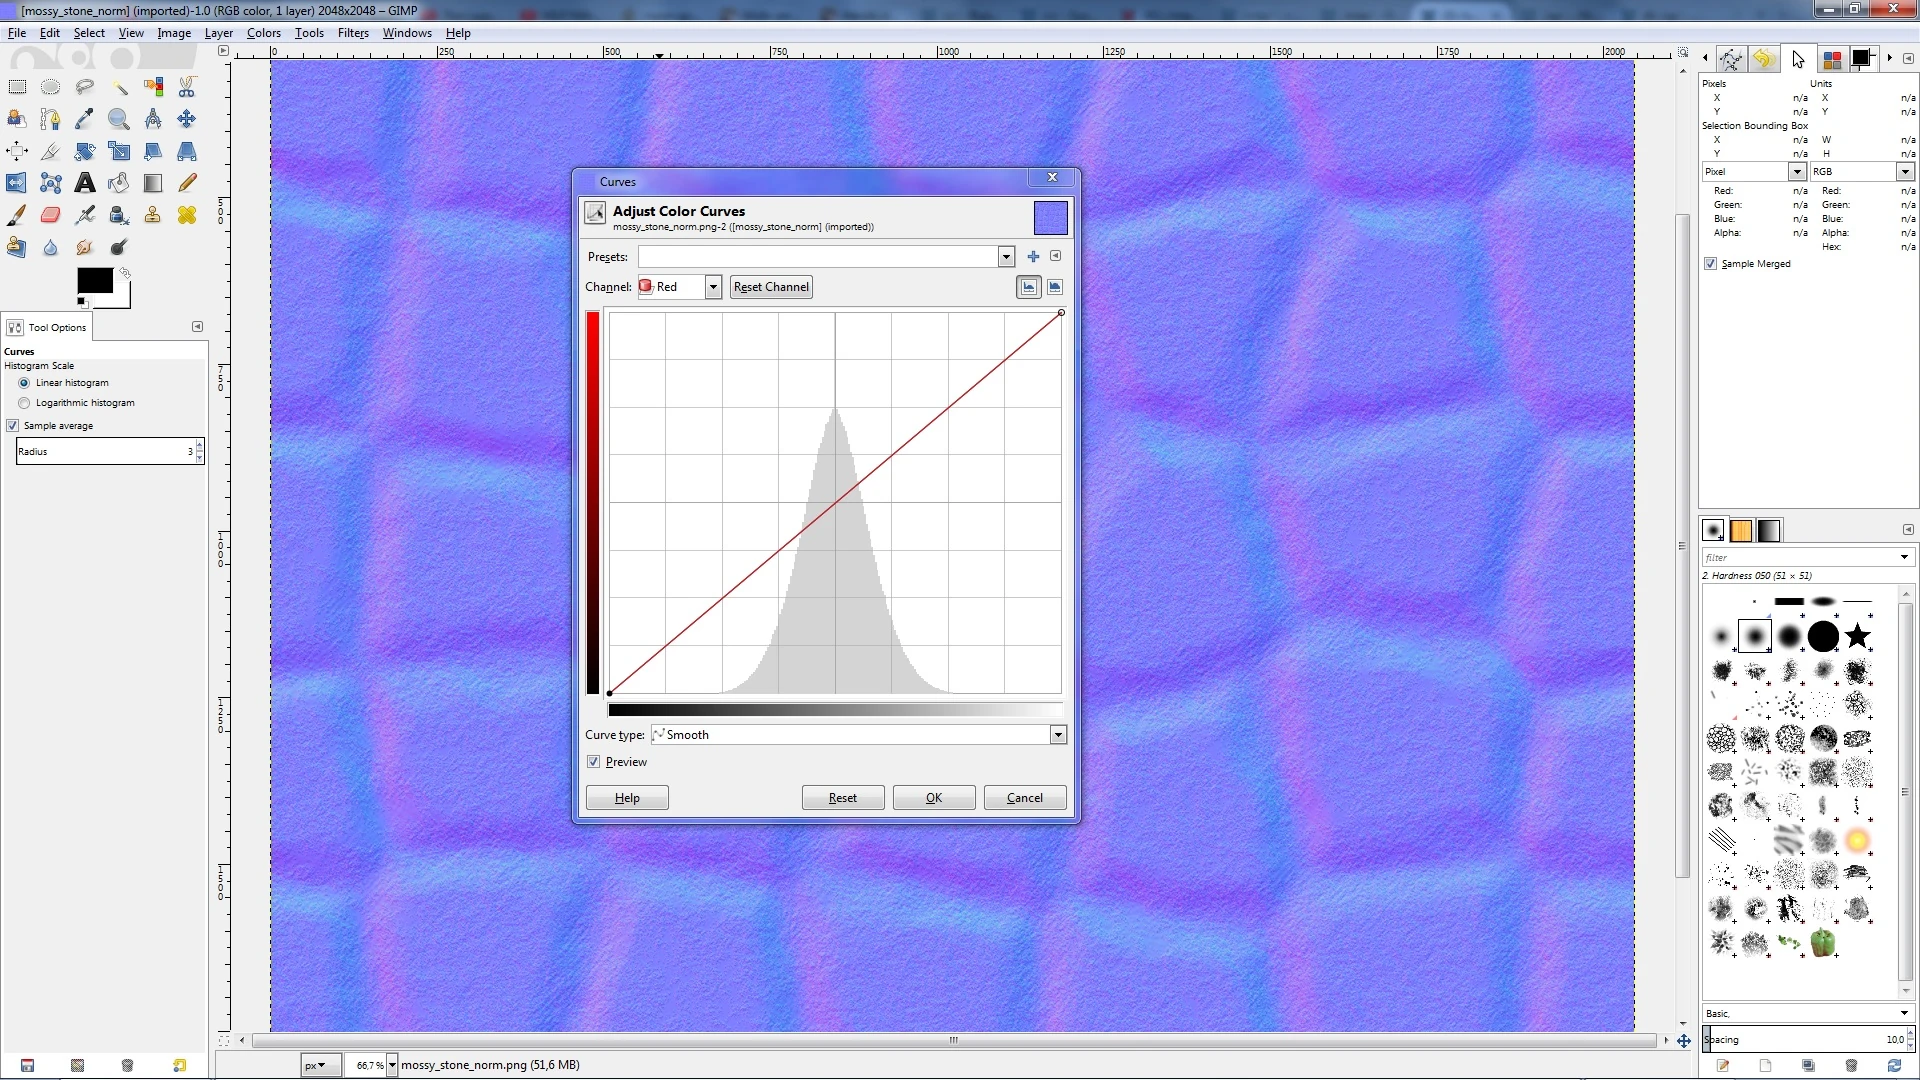
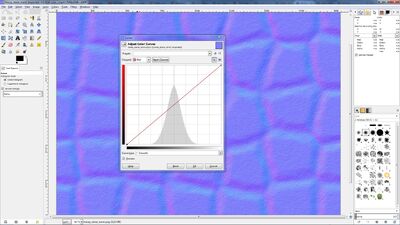
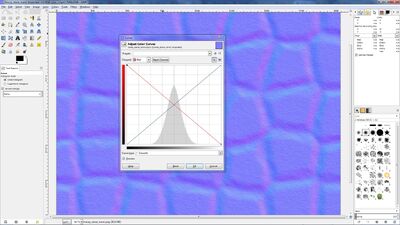
| + | The "Normal Map"-Node in NeoTextureEdit has reverted the red channel compared to the Urho shaders. You can fix this with custom shaders or by inverting the red channel of the generated normal map image like this in for example GIMP:[[File:NTE fix1.jpg|thumb|400x400px|none]]Go to "Colors->Curves" and select the red channel as shown above.[[File:NTE fix2.jpg|thumb|400x400px|none]]Move the point in the lower left corner to the top left and the point at the top right corner to the lower right corner as shown here and you are done. |
||
== Texture Gallery == |
== Texture Gallery == |
||
| + | Mossy stone: [https://raw.githubusercontent.com/gawag/Urho-Sample-Platformer/master/blends/mossy_stone.tgr NeoTextureEdit project file] |
||
| + | |||
| + | <gallery> |
||
| + | Urho NTE.jpg |
||
| + | NTE mossy stone commented.jpg |
||
| + | https://raw.githubusercontent.com/gawag/Urho-Sample-Platformer/master/Build/bin/Data/Textures/mossy_stone_diff.jpg |
||
| + | https://raw.githubusercontent.com/gawag/Urho-Sample-Platformer/master/Build/bin/Data/Textures/mossy_stone_norm.jpg |
||
| + | https://raw.githubusercontent.com/gawag/Urho-Sample-Platformer/master/Build/bin/Data/Textures/mossy_stone_spec.jpg |
||
| + | </gallery> |
||
Revision as of 02:49, 29 June 2015
NeoTextureEdit (http://neotextureedit.sourceforge.net/) is a free software (LGPL) Java tool to create procedural and seamless textures with a node based system. It's weird too use, sometimes super slow, lacks documentation and the examples are not that good. This page tries to help a bit.
Program Explanation
You can move the node view with the middle mouse button and create new nodes with the right click menu.
The OpenGL preview area in the lower left can preview diffuse, normal, specular and parallax mapping. Urho3D doesn'T come with a parallax mapping shader, so you may want to disable the parallax mapping feature by setting the "POM Strength" to 0. Which node is used int the preview for which kind of mapping is shown by the blue D, N, S or H at the right side of the node (see second screenshot below).
Example Usage
This example is based on the cobblestone sample shipped with NeoTextureEdit , but improved:

Used Urho material file:
<material>
	<technique name="Techniques/DiffNormalSpec.xml"/>
	<texture name="Textures/mossy_stone_diff.jpg" unit="diffuse"/>
	<texture name="Textures/mossy_stone_norm.jpg" unit="normal"/>
	<texture name="Textures/mossy_stone_spec.jpg" unit="specular"/>
	<parameter name="MatDiffColor" value="0.9 0.9 0.9 1"/>
	<parameter name="MatSpecColor" value="1.5 1.5 1.5 250"/>
</material>
The shipped examples are often using the "FilterEmboss"-Node which is simulating light fall on the material, which seems to be similar to the "Bump Map"-filter in GIMP (Filters->Map->Bump Map). Such an effect is weird to use to create textures as a bump or normal map should be dynamically rendered in the game (if you use normal mapping) using the textures and should not be prerendered into the textures.
The "Blur"-node (the red one, I guess it's red because it's making the calculation super slow) is used to make the transition between the stone tiles and the gap between them softer. The normal map calculation gives really bad results without this blurring. You can also blur the calculated normal map image afterwards using other tools like Gimp. A slight blur with a radius of 1 or 2 is usually enough.
Fixing the Normal Map
The "Normal Map"-Node in NeoTextureEdit has reverted the red channel compared to the Urho shaders. You can fix this with custom shaders or by inverting the red channel of the generated normal map image like this in for example GIMP:
Go to "Colors->Curves" and select the red channel as shown above.

Move the point in the lower left corner to the top left and the point at the top right corner to the lower right corner as shown here and you are done.
Texture Gallery
Mossy stone: NeoTextureEdit project file
")
")